Introduction
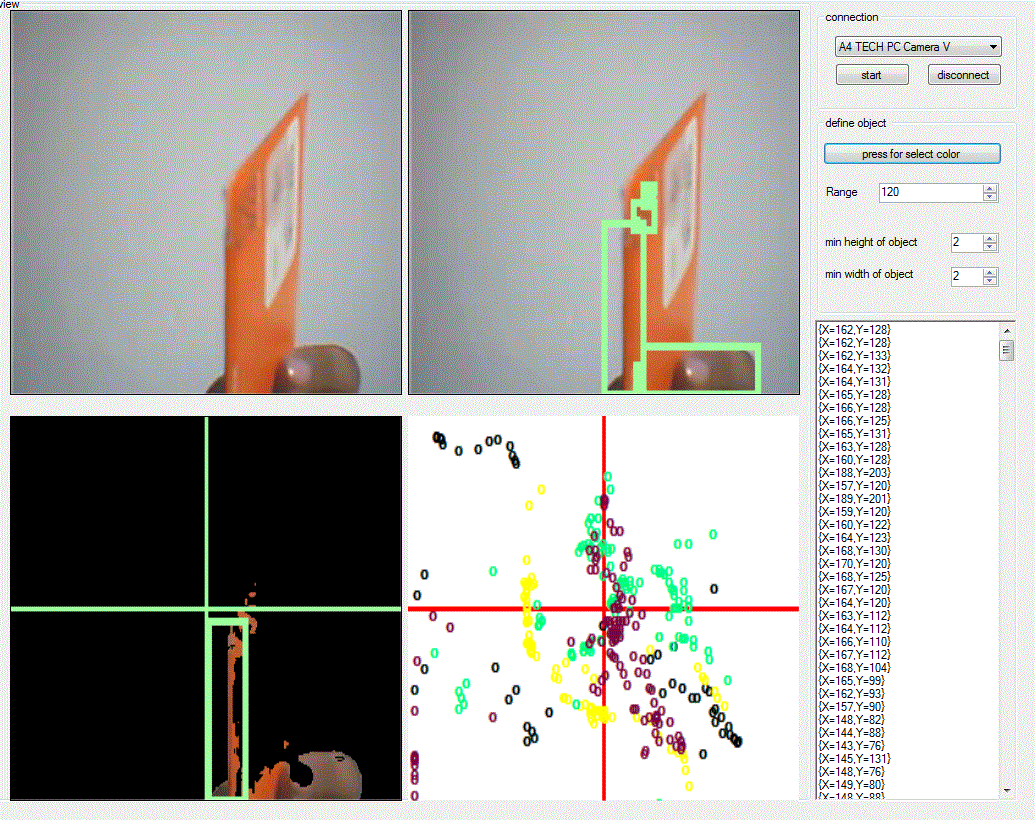
You can select a color in real time and it tracks that color object and gives you the position. I use the Aforge library for that. I also used .NET Framework 4.0. It is a C# desktop application, it can take up to 25 frames per second. You can change color size any time you want, the color of drawing point will also change.
Background
I saw a very interesting project in CodeProject named Making of Lego pit camera. With the help of this project, I thought a real time tracker could be made where the color and object's size could also be changed in real time. and can draw the movement of that object in a bitmap with that color. I used some part of their code, although I used a separate color filter for more accuracy.
Using the Code
The steps are very simple:
- Take videoframe from webcam
- Use filtering by given color (here Euclidian filtering is used)
- Make greyscale
- Find objects by given size
- Find biggest object
- Draw object position in bitmap
First, I will explain how my software works. It can start tracking by the default color black and a color range of 120, but you can change that in real time. To change color, use the color dialog to select a color, remember to press OK and check in the solid color box if your required color is present or not.
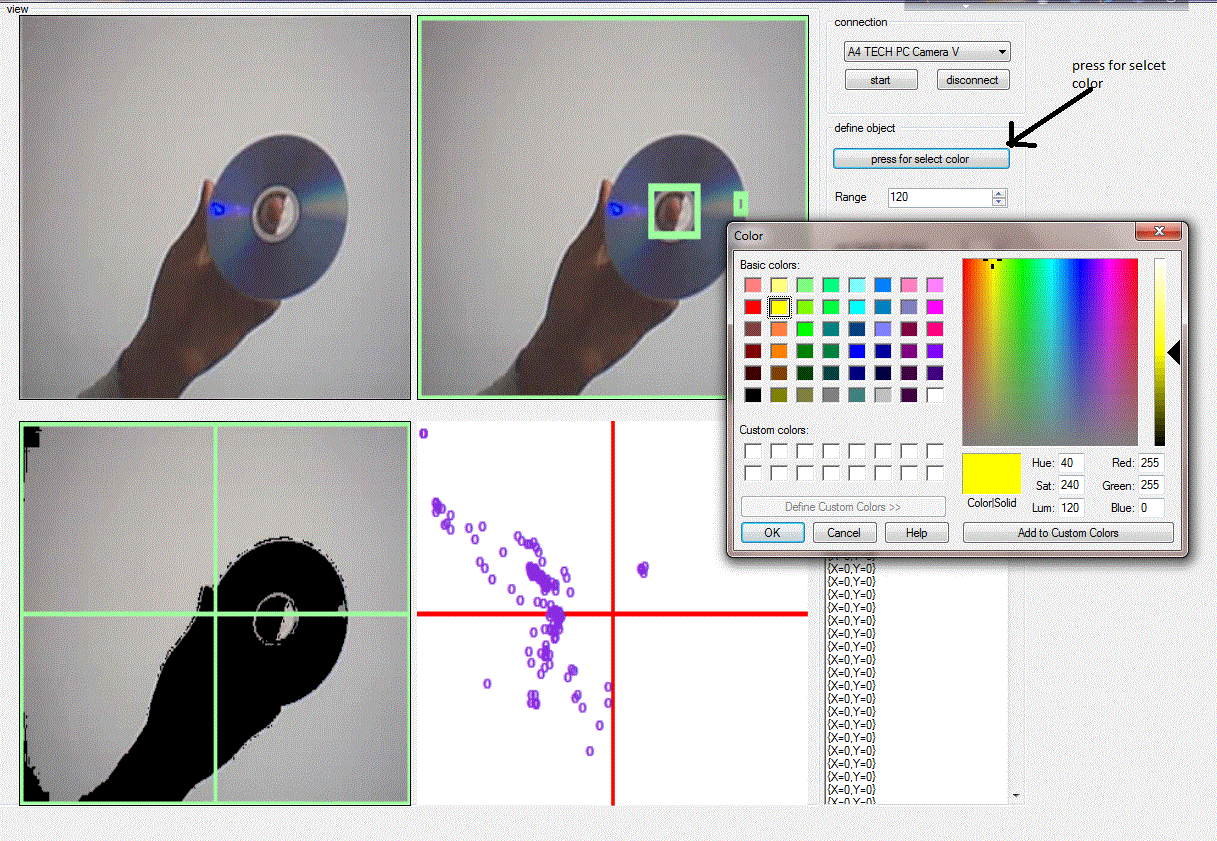
To select the range and define the minimum size of the object, see the next image, there are three numeric updown lists for that.
objectsize is calculated in pixels. Now about the views: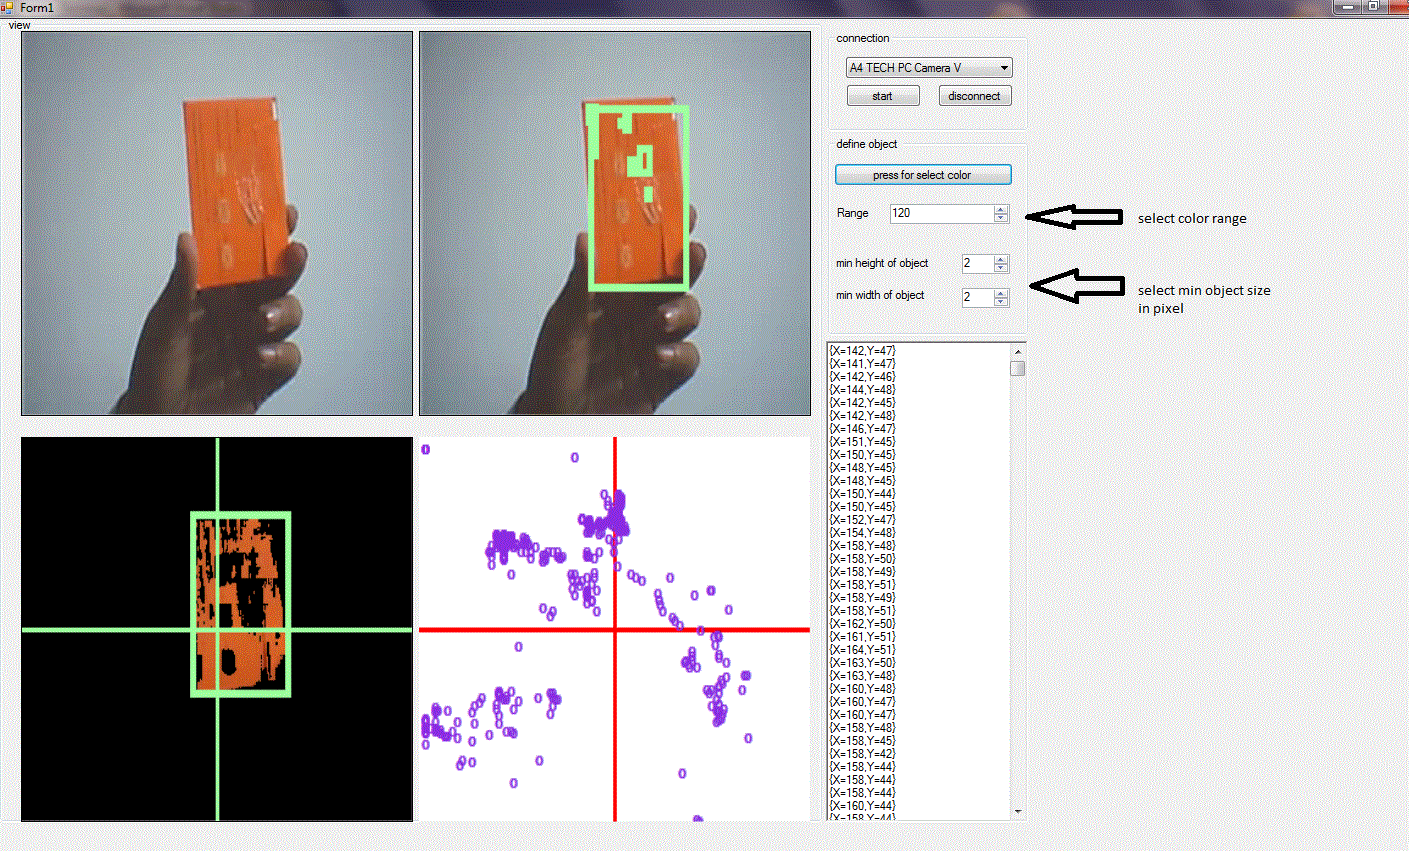
There are four views, three of them are Aforge video source controls and the other is a
PictureBox. The first one shows a normal video, the second one shows all the detected objects, the third box shows only the biggest object, and the fourth one just draws a 0 sign in the biggest object location. See the below image for a clearer view: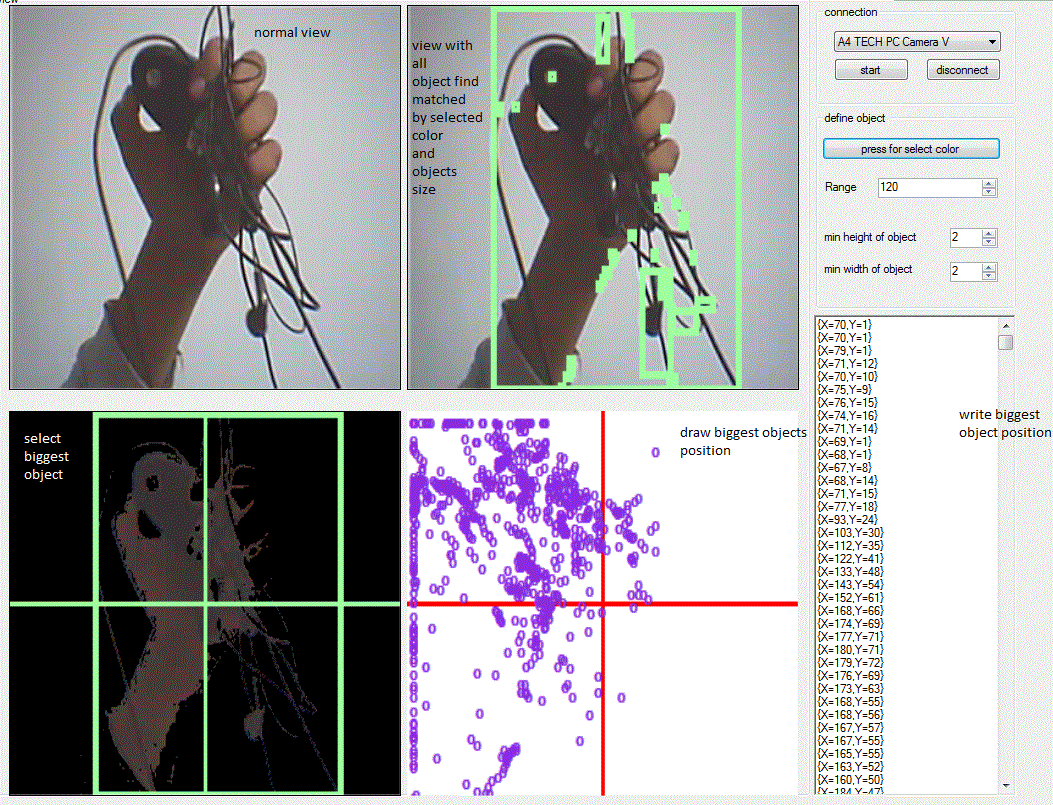
I also added a
RichTextBox which shows the pixel of the biggestrectangle position. Now about the code for connection, I use normal Aforge connection code.
For that, you need to download the Aforge DLL, and also add a very good video control for showing video. You can add it to your toolbox. Just click a free space on toolbox, choose items-> browse the DLL -> add the control.
Hide Copy Code
using AForge;
using AForge.Video.DirectShow;
Then initialize:
Hide Copy Code
videoDevices = new FilterInfoCollection(FilterCategory.VideoInputDevice);
if (videoDevices.Count == 0)
    throw new ApplicationException();
foreach (FilterInfo device in videoDevices)
{
    VideoCaptureDevice videoSource = new VideoCaptureDevice(device.MonikerString);
    videoSource.DesiredFrameSize = new Size(320, 240);
    videoSource.DesiredFrameRate = 15;
    videoSourcePlayer1.VideoSource = videoSource;
    videoSourcePlayer1.Start();
}
For
videoplayercontrol, add an event in its misc named:
Hide Copy Code
 private void videoSourcePlayer1_NewFrame(object sender, ref Bitmap image)
{
//work with image
}
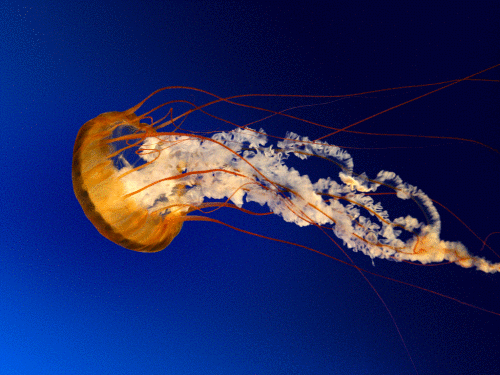
For understanding how filtering works, I will explain using a picture of a jellyfish. Here, I take a red center color for understanding. In my provided software, the user can choose his requested color and size.
In that function, I apply my color detection code by writing Euclidean filtering and then use blob counter to extract data. I will explain it in detail here.
To see
EuclideanColorFiltering work, first see:
We are going to apply a color filter. It is a very simple code to use
euclideanfiltering:
Hide Copy Code
// create filter
EuclideanColorFiltering filter = new EuclideanColorFiltering( );
// set center colol and radius
filter.CenterColor = Color.FromArgb( 215, 30, 30 );
filter.Radius = 100;
// apply the filter
filter.ApplyInPlace( image );
Now see the effect:
Well, to understand how it works, look closely at the code:
Hide Copy Code
filter.CenterColor = Color.FromArgb( 215, 30, 30 );
filter.Radius = 100;
The first line selects the selected color value. You all know that color has a value 0 to 255. Using
filter.CenterColor = Color.FromArgb( 215, 30, 30 ); I specify my center color will be a red effected color because here the value of red is 215, green and blue is 30, and filter.Radius = 100 means that all color values near 100 are in my specified color. Now my filter filters the pixels, and decides which color is inside/outside of RGB sphere with the specified center and radius – it keeps pixels with colors inside/outside of the specified sphere and fills the rest with the specified color.
Now for detecting objects, I use bitmap data and use the
lockbits method. To clearly understand this method, see here. Then, we make it a greyscale algorithom, then unlock it.
Hide Copy Code
BitmapData objectsData = image.LockBits(new Rectangle(0, 0,
   image.Width, image.Height),ImageLockMode.ReadOnly, image.PixelFormat);
// grayscaling
UnmanagedImage grayImage =  grayscaleFilter.Apply(new UnmanagedImage(objectsData));
// unlock image
image.UnlockBits(objectsData);
Now for the object, we use a
blobcounter. It is a very strong class that Aforge provides.
Hide Copy Code
blobCounter.MinWidth = 5;
blobCounter.MinHeight = 5;
blobCounter.FilterBlobs = true;
blobCounter.ProcessImage(grayImage);
Rectangle[] rects = blobCounter.GetObjectRectangles();
foreach(Rectangle recs in rects)
if (rects.Length > 0)
{
    foreach (Rectangle objectRect in rects)
    {
        Graphics g = Graphics.FromImage(image);
        using (Pen pen = new Pen(Color.FromArgb(160, 255, 160), 5))
        {
            g.DrawRectangle(pen, objectRect);
        }

        g.Dispose();
        }
    }
blobCounter.MinWidth and blobCounter.MinHeight define the smallest size of the object in pixels, and blobCounter.GetObjectRectangles() returns all the objects rectangle position, and using the graphicsclass, I draw a rectangle over the images.
Now, if you want to take only the biggest object, there is a method for that:
Hide Copy Code
blobCounter.MinWidth = 5;
blobCounter.MinHeight = 5;
blobCounter.FilterBlobs = true;
blobCounter.ObjectsOrder = ObjectsOrder.Size;
blobCounter.ProcessImage(grayImage);
Rectangle[] rects = blobCounter.GetObjectRectangles();
foreach(Rectangle recs in rects)
    if (rects.Length > 0)
    {
       Rectangle objectRect = rects[0];
       Graphics g = Graphics.FromImage(image);
       using (Pen pen = new Pen(Color.FromArgb(160, 255, 160), 5))
       {
           g.DrawRectangle(pen, objectRect);
       }
       g.Dispose();
    }
Now the image is like this:

But if you want to extract, you can use the following code:
Hide Copy Code
Bitmap bmp = new Bitmap(rects[0].Width, rects[0].Height);
Graphics g = Graphics.FromImage(bmp);
g.DrawImage(c, 0, 0, rects[0], GraphicsUnit.Pixel);
So you will get your object like that:

For drawing the bitmap, I had to use threading. The thread was called in the
videosurecplayer event.
Hide Copy Code
void p(object r)
{
   try
   {//create image
   Bitmap b = new Bitmap(pictureBox1.Image);
   Rectangle a = (Rectangle)r;
   Pen pen1 = new Pen(Color.FromArgb(160, 255, 160), 3);
   Graphics g2 = Graphics.FromImage(b);
   pen1 = new Pen(color, 3);
   SolidBrush b5 = new SolidBrush(color);
    Font f = new Font(Font, FontStyle.Bold);
   g2.DrawString("o", f, b5, a.Location);//draw the position
   g2.Dispose();
   pictureBox1.Image = (System.Drawing.Image)b;
   this.Invoke((MethodInvoker)delegate
       {
           richTextBox1.Text = a.Location.ToString() +
   "\n" + richTextBox1.Text + "\n"; ;
       });
   }
   catch (Exception faa)
   {
       Thread.CurrentThread.Abort();
   }
  Thread.CurrentThread.Abort();
}
I have to use invoke to write in the
textbox because of cross threading. To send the rectangle object, I use a parameterized thread. The thread aa calls the function p() to draw on the bitmap and write in the textbox.
Hide Copy Code
[__strong__]if (rects.Length > 0)
{
    Rectangle objectRect = rects[0];

    // draw rectangle around derected object
    Graphics g = Graphics.FromImage(image);

    using (Pen pen = new Pen(Color.FromArgb(160, 255, 160), 5))
    {
        g.DrawRectangle(pen, objectRect);
    }
    g.Dispose();
    int objectX = objectRect.X + objectRect.Width / 2 - image.Width / 2;
    int objectY = image.Height / 2 - (objectRect.Y + objectRect.Height / 2);
    ParameterizedThreadStart t = new ParameterizedThreadStart(p);
    Thread aa = new Thread(t);
    aa.Start(rects[0]);
}


Komentar
Posting Komentar